Using Conditional Fields in the Elementor Form plugin, you can send emails conditionally based on specific user inputs.
Why Send Email Conditionally?
Sending emails conditionally means triggering different email responses based on how users fill out your form. Not every form submission is same, when users fill out a form, they might be making different types of requests.
So, instead of sending the same generic message every time, you can customize the email content or recipient depending on user selections. By sending emails conditionally, you ensure that the right person or department receives the right message.
Enable Conditional Emails on Submit
* Firstly, make sure you have “Turned on“ the Email Conditionally feature in the WordPress Admin Panel >> Elementor >> Cool FormKit >> Form Elements Tab.
- Navigate to the Action after submit section below the Form Fields.
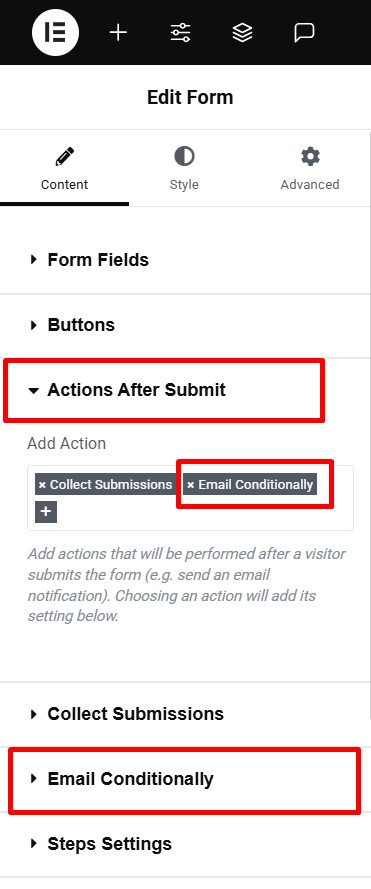
- Select “Email Conditionally” from the list. A new panel called Email Conditionally will appear.
- Toggle ON the Enable Conditions switch.
Add a Conditional Logic Rule on Email
Once the conditions are enabled, follow these steps:
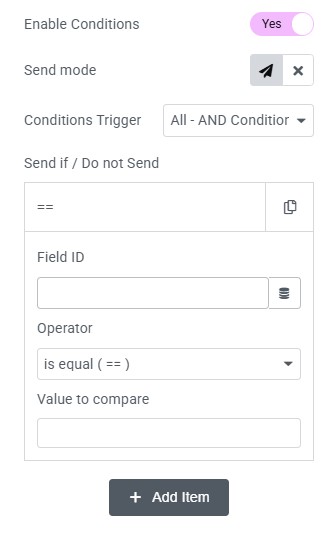
- Choose how the email action should behave:
- Show or Hide the email action
- Enable or Disable the email action
- Under Condition Trigger, you can combine multiple conditions using:
- AND Logic – All conditions must be true
- OR Logic – At least one condition must be true
- Enter the Field ID of the form field that will trigger the condition.
- Choose a comparison operator (e.g., Equals, Not Equals, Contains, etc.)
Add Any Number of Conditional Emails
You can add multiple conditional emails to your form by selecting “Email Conditionally 1,” “Email Conditionally 2,” and so on from the Actions After Submit list. To increase the number of available conditional email actions, follow these simple steps:
- Go to your WordPress dashboard.
- Navigate to Elementor > Cool FormKit.
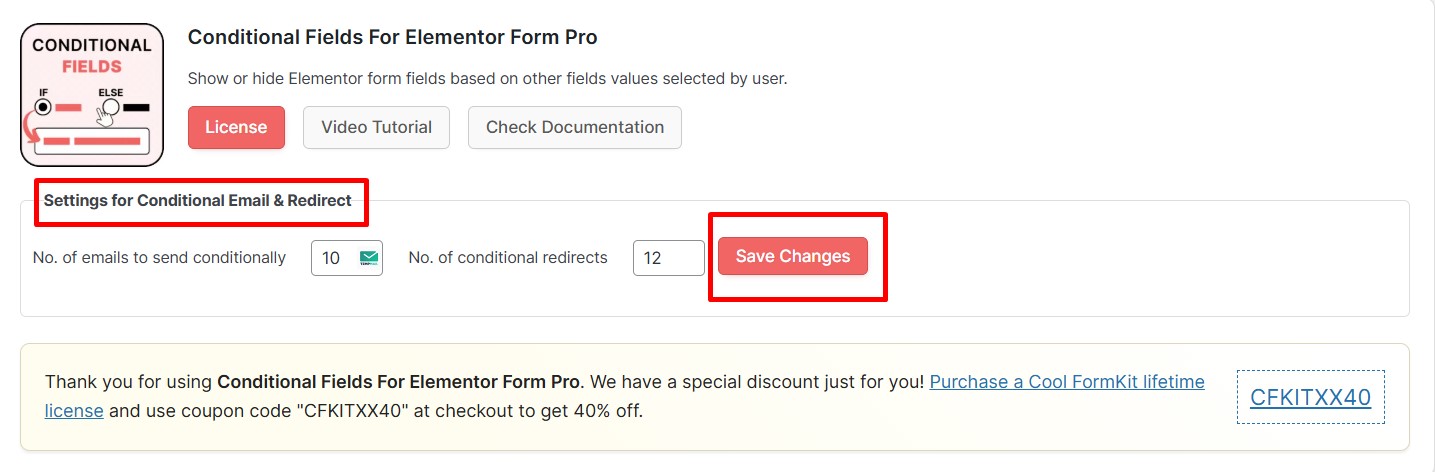
- Under the settings panel, you’ll see the section labeled: Configure the settings for conditional fields’ action after submit.
- In the field labeled “Number of Conditional Emails”, define how many conditional email actions you want to configure for your forms.
- Once you’ve added your desired numbers, save the Changes.