To translate your website via Google Chrome AI using the AI Translation for Polylang (Pro), please follow these steps:
Installation and Activation
- Install and activate the Polylang plugin and the AI Translation for Polylang (Pro) on your WordPress website.
- Navigate to the Pages section. Edit the page you want to translate.
- On the right side of the page editor, there is a Languages settings tab.
- Under Translations, click the “+” icon.
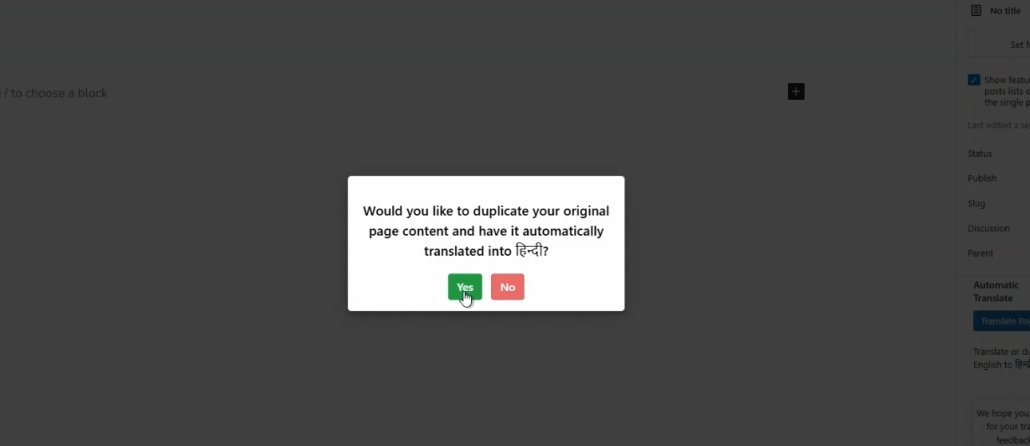
- A prompt will appear asking if you want to duplicate the original page content. Select “Yes”.
Translating the Page Content
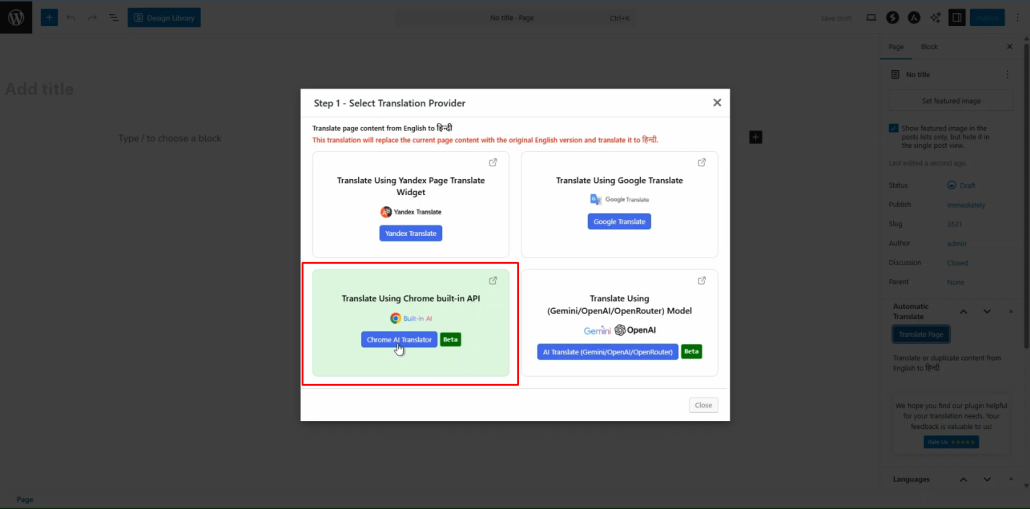
- Next, a new box titled Select Translation Provider will appear; choose Chrome AI Translator as your translation provider.
Alternatively, you can:
- Go to the settings tab and select the Automatic Translation tab.
- Click on Translate Content, and a pop-up box will ask you to select a translation provider. Select Chrome AI Translator.
- Once selected, a tab containing both the source text and translation text will appear.
- Click Translate. The translation process will begin, and wait for a few minutes.
Update Translation
- After the translation completes, click Update Content.
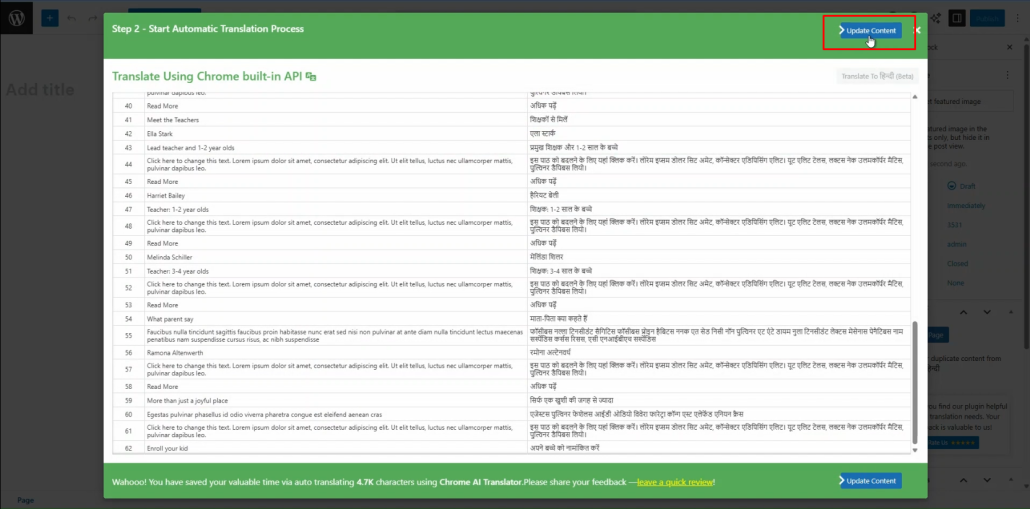
- All content of the website will be translated into a selected language in a single click, now preview it and make manual edits to adjust translations for better accuracy.
That’s it! You have successfully translated your Webpage via Chrome’s built-in AI using the AI Translation for Polylang (Pro).