If you’re using AI Translation for TranslatePress, you can enable the Google Translate widget to automatically translate your webpage content within a few minutes.
Why Use Google Translate Widget?
The Google Translate Widget is a simple and effective way to make your website multilingual without any technical setup. It allows you to instantly translate your content into their preferred language using Google’s translation engine, without any external API key or configurations.
Automatically Translate Page Content
Follow the steps below to automatically translate your webpage content using Google Translate Widget:
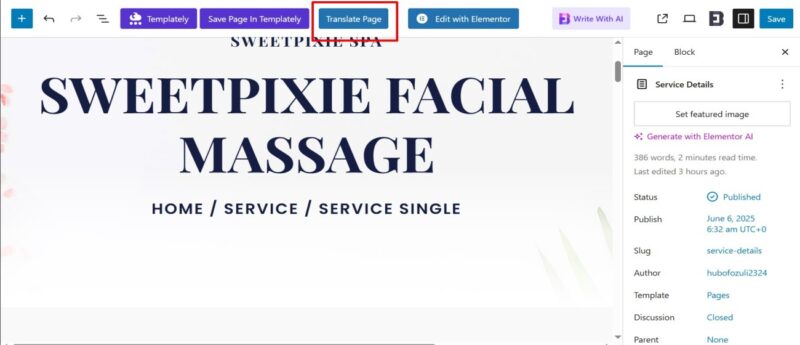
- Open the page or post you want to translate.
- Click the “Translate Page” button displayed at the top. This will open the live translation editor.

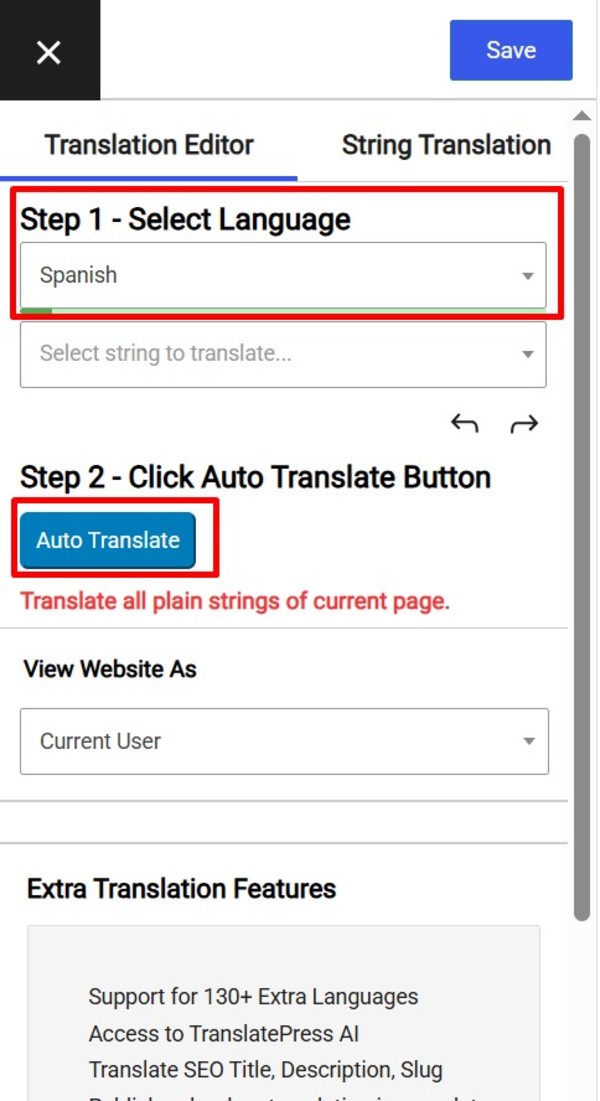
- In the translation editor, select the language you want to translate the page into.

- After selecting the target language, the Auto Translate button will be enabled.
- Click the “Auto Translate” button.
- A pop-up will appear asking you to choose a translation provider. Select Google Translate Widget from the available options.

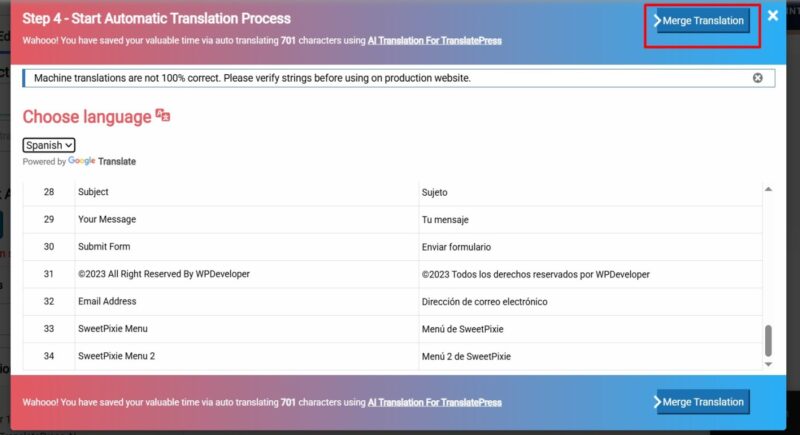
- Select the language to start the automatic translation process.

- After the translation completes, click the “Merge Translation” button.

- Review the translated content directly in the editor. You can manually edit or adjust content if needed.
- Click the “Save Translation” button to store the translated version of your page.

* Note that while automatic translation tools can be helpful, they may not provide perfect translations, and there may be inaccuracies or errors in the translation. Therefore, it’s always a good idea to have a professional translator review the translation if it’s critical for your business or organization.