A Confirm Dialog Box is a pop-up prompt that appears before you submit a form, asking you to confirm or cancel the action. Using Cool FormKit you can easily add confirm dialog box to your forms.
Why Use a Confirm Dialog?
A Confirm Dialog Box helps prevent accidental form submissions and gives users a final chance to review their input before proceeding. It’s especially useful in scenarios where actions are irreversible or sensitive, such as submitting payments, registrations, or deleting data.
Example: Imagine you’re running a course registration form. A user accidentally clicks the submit button without double-checking the selected course or their contact details. With a confirmation prompt, they see a message like “Are you sure you want to submit this form?” giving them a chance to go back and correct any mistakes.
This simple layer of confirmation enhances form accuracy, improves trust, and reduces errors.
Follow these simple steps to add a confirm dialog box in Elementor forms:
Enable Confirmation Prompt
* Firstly, make sure you have “Turned on“ the confirm dialog box feature in the WordPress Admin Panel >> Elementor >> Cool FormKit >> Form Elements Tab.
- After enabling the Confirm Dialog box form element, a new section labeled Confirm Dialog before submit will appear.

Customize Text and Buttons
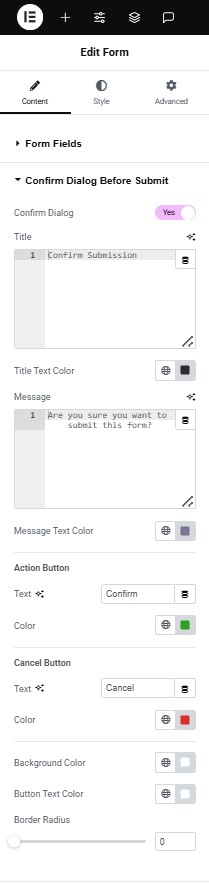
- Toggle on the confirm dialog option. When enabled, the form won’t submit immediately, it first shows a dialog box asking the user to confirm.
- Title: Set the main heading of the confirmation dialog box, which appears at the top and informs the user about the action they’re about to confirm.
- Title Text Color: Customize the color of the dialog title to match your website theme.
- Message: This is the main text shown below the title. Clearly explain what the user is about to do and prompt them to review their input.
- Message Text Color: Choose a color for the message text according to your form’s style.
- Action Button Text: Define the label for the confirm button (e.g., “Confirm”, “Yes, Submit”).
- Action Button Color: Set a color for the confirm button according to your preferences.
- Cancel Button Text: Set the label for the cancel or back button (e.g., “Cancel”, “Go Back”). This gives users the option to stop or revise their submission.
- Cancel Button Color: Choose a color for the cancel button to show it’s a reversal action.
That’s it, by following these steps, you can make your Elementor forms secure and error-free.