Conditional GetResponse allows you to send user data to GetResponse only when specific conditions are met, for example, when a user checks a box, selects an option, or enters a particular value. With Cool FormKit, you can easily set up and manage conditional GetResponse integrations.
Why Conditional GetResponse?
As we discussed above, Conditional GetResponse lets you send form data to your GetResponse list only when a user meets specific conditions. This means it won’t add every form submission to your email list — instead, it will only add the people who genuinely want to subscribe.
Let’s say you have a contact form with a checkbox that says: “Subscribe to our newsletter?” With Conditional GetResponse, only the users who check that box will be added to your GetResponse list. If they leave it unchecked, their data won’t be sent.
Enable Conditional GetResponse
* Firstly, make sure you have turned on the Conditional GetResponse feature in the WordPress Admin Panel >> Elementor >> Cool FormKit >> Form Elements Tab.
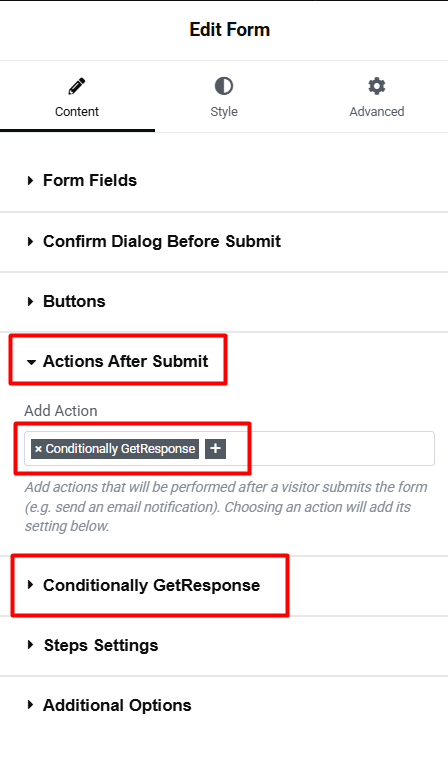
- Navigate to the Action after submit section below the Form Fields.
- Select “Conditionally GetResponse” from the list. A new panel called Conditionally GetResponse will appear.
Use the steps below to correctly set up Conditional GetResponse in your Elementor form:
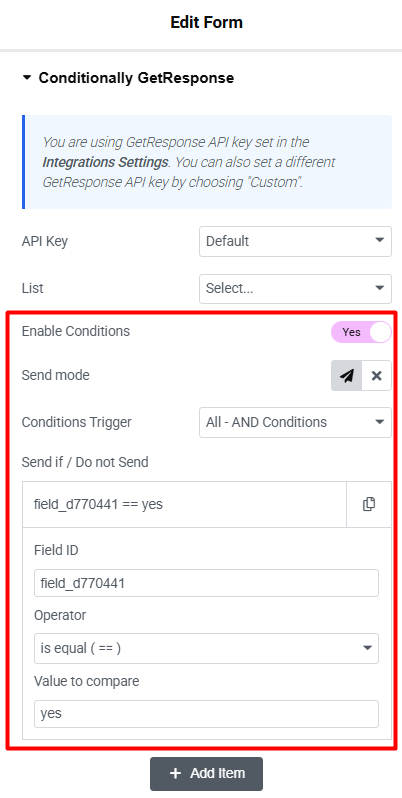
- API Key: Leave this as “Default” if you’ve already connected your GetResponse API key or you can select “Custom” only if you want to use a different GetResponse account for this form.
- List: Choose the GetResponse List where you want to send subscriber data.
- Day Of Cycle: Choose which day of your autoresponder sequence a subscriber should start receiving emails.
- Field Mapping: Match your form fields with GetResponse fields like: Email, First Name, Last Name. Make sure each dropdown matches the correct field ID used in your form.
Now, let’s enable the conditional logic for GetResponse
- Toggle ON the Enable Conditions switch.
- Under Condition Trigger, you can combine multiple conditions using:
- AND Logic – All conditions must be true.
- OR Logic – At least one condition must be true.
- Enter the Field ID of the form field that will trigger the condition.
- Choose a comparison operator (e.g., Equals, Not Equals, Contains, etc.)
That’s it! Conditional GetResponse has been successfully set up in your Elementor form using Cool FormKit.
Add Any Number of Conditional GetResponse
You can add multiple conditional GetResponse to your form by selecting “Conditionally GetResponse 1,” “Conditionally GetResponse 2,” and so on from the Actions After Submit list. To increase the number of available conditional getresponse actions, follow these simple steps:
- Go to your WordPress dashboard.
- Navigate to Elementor > Cool FormKit.

- Under the settings panel, you’ll see the section labeled: Configure the settings for conditional fields’ action after submit.
- In the field labeled “Number of Conditional GetResponse”, define how many conditional getresponse actions you want to configure for your forms.
- Once you’ve added your desired numbers, save the Changes.