Conditional Webhook, allows you to send data to different URLs based on user input or specific conditions. Using Cool FormKit, you can easily integrate a conditional webhook to your Elementor forms.
Why Conditional Webhook?
A webhook sends your form data to just one fixed URL, no matter what the user selects or fills out.
For example, if your form has a dropdown field called “Inquiry Type” with options like Sales, Support, and Feedback, sending all submissions to the same webhook means you’ll have to sort and manage messages manually, which takes extra time and effort.
With Conditional Webhooks, each option can have its own unique webhook URL. So, when user selects Sales, the data goes to your CRM system. If they select Support, it’s sent to your support tool. And if they choose Feedback, the data is sent to specific URL.
This way, each submission goes directly to the right place automatically, saving time and efforts.
Enable Conditional Webhook
Follow these simple steps to add a conditional webhook in your Elementor Forms:
* Firstly, make sure you have turned on the Conditional Webhook feature in the WordPress Admin Panel >> Elementor >> Cool FormKit >> Form Elements Tab.
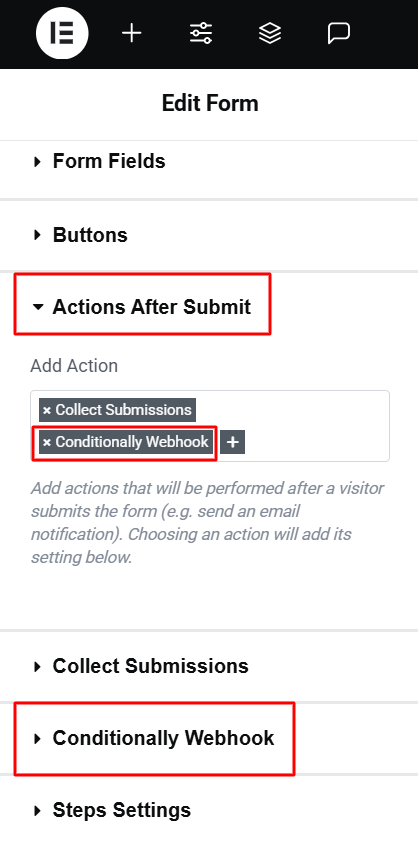
- Navigate to the Action after submit section below the Form Fields.
- Select “Conditionally Webhook” from the list. A new panel called Conditionally Webhook will appear.
Add Conditions
After adding Conditional Webhook section, let’s set up conditions for it:
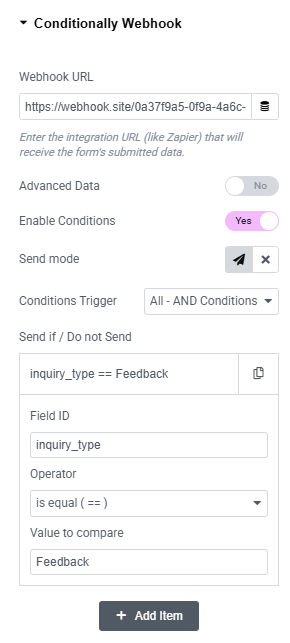
- Webhook URL: Enter the integration URL where you want to send your form data.
- Toggle the Enable Conditions switch to Yes to activate conditional logic.
- Use the Send Mode icons to decide what happens when a condition is met:
- Send: Webhook will be triggered when the condition matches.
- Do Not Send: Webhook will not trigger when the condition matches.
- Under Condition Trigger, you can combine multiple conditions using:
- AND Logic – All conditions must be true
- OR Logic – At least one condition must be true
- Enter the Field ID of the form field that will trigger the condition.
- Choose a comparison operator (e.g., Equals, Not Equals, Contains, etc.) and enter a value to compare.
Now, Webhook will automatically send data to different URLs based on user selections.
Add Any Number of Conditional Webhooks
You can add multiple conditional webhooks to your form by selecting “Webhook Conditionally 1,” “Webhook Conditionally 2,” and so on from the Actions After Submit list. To increase the number of available conditional webhook actions, follow these simple steps:
- Go to your WordPress dashboard.
- Navigate to Elementor > Cool FormKit.
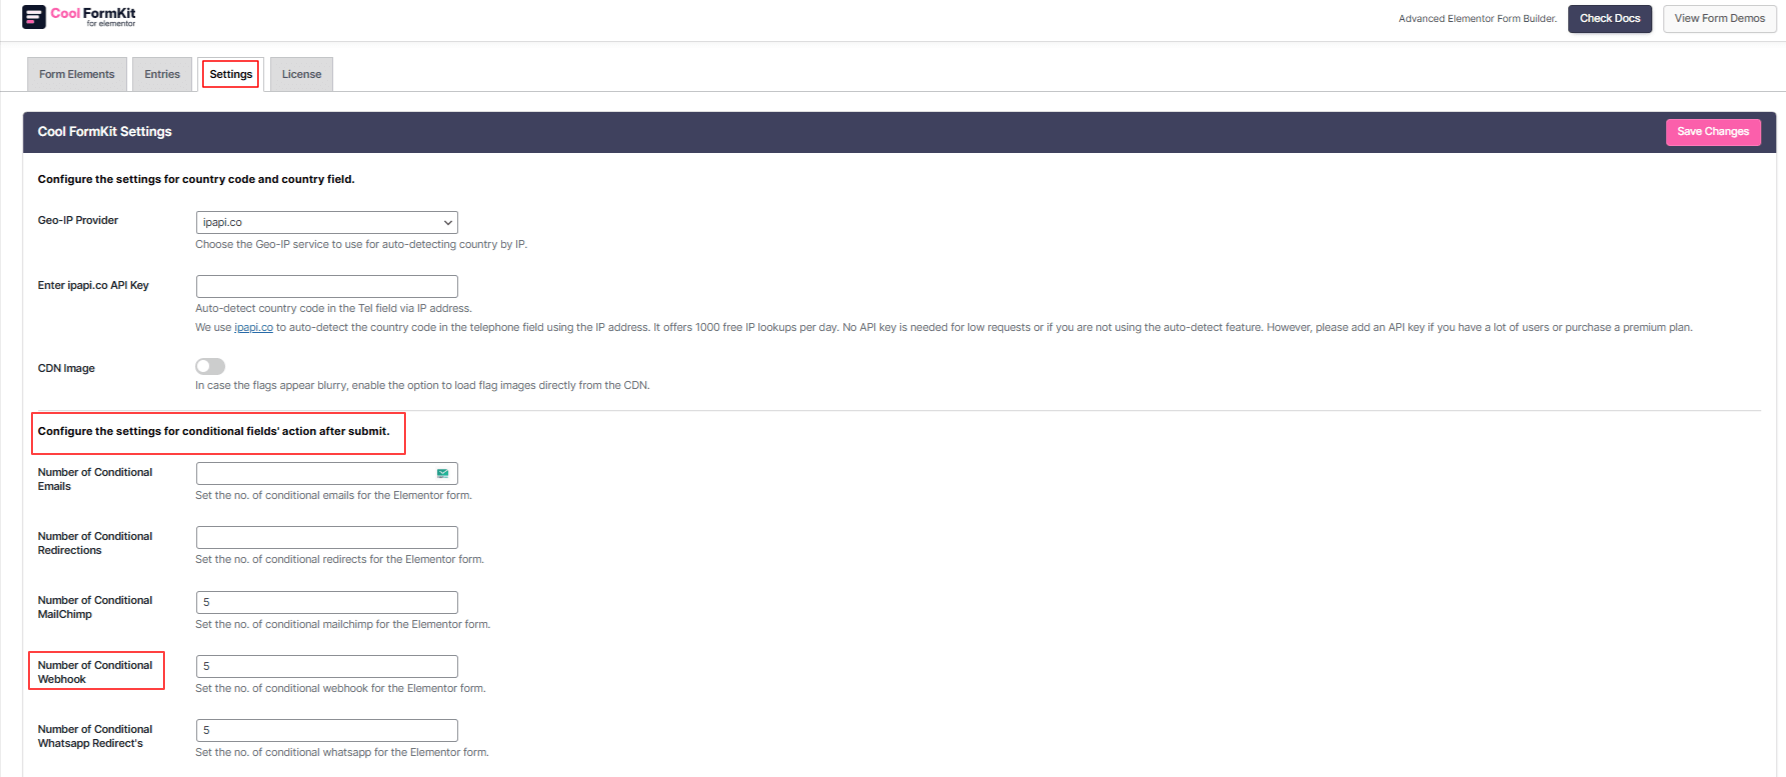
- Under the settings panel, you’ll see the section labeled: Configure the settings for conditional fields’ action after submit.
- In the field labeled “Number of Conditional Webhooks”, define how many conditional webhook actions you want to configure for your forms.
- Once you’ve added your desired numbers, save the Changes.