Using Cool FormKit, you can limit the range of selectable dates in your date picker, perfect for preventing past or future dates that shouldn’t be chosen, by using the Restrict Date Field in Elementor Forms feature.

Why Enable Restrict Date?
Restricting the date helps ensure users can only select valid and relevant dates in your forms. For example, you might want to prevent users from selecting past dates for appointment bookings or limit a range for event registrations. This improves data accuracy and user experience by guiding them to only enter acceptable date values.
Follow these simple steps to add a date field to your Elementor Forms:
Add Date Field
* Firstly, make sure you have “Turned on“ the Restrict Date field feature in the WordPress Admin Panel >> Elementor >> Cool FormKit >> Form Elements Tab.
- Navigate to the Content section of your Form Field. From the Field Type dropdown, select Date Field.
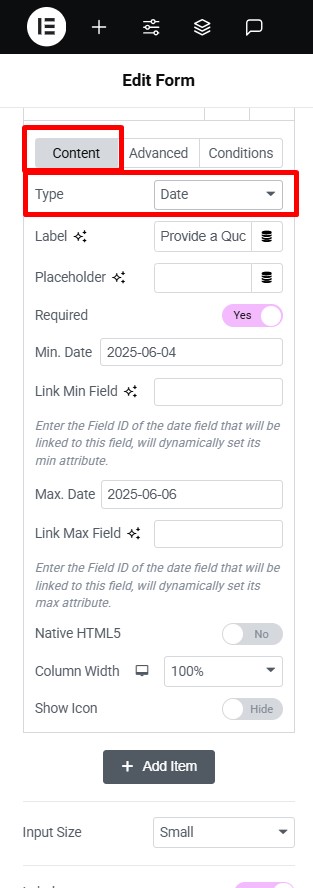
Customization
Once you’ve added the date field, you can customize it by using the following options:

- Min. Date: Set the earliest date that users can select. For example,
2025-06-04will prevent users from selecting any earlier week or month. - Link Min Field: Enter the Field ID of the date field that will be linked to this field, will dynamically set its min attribute.
- Max. Date: Set the latest selectable date. For instance,
2025-06-06restricts users from choosing a date beyond this point. - Link Max Field: Enter the Field ID of the date field that will be linked to this field, will dynamically set its min attribute.
That’s it, the restricted date field will be successfully added to your Elementor Form.