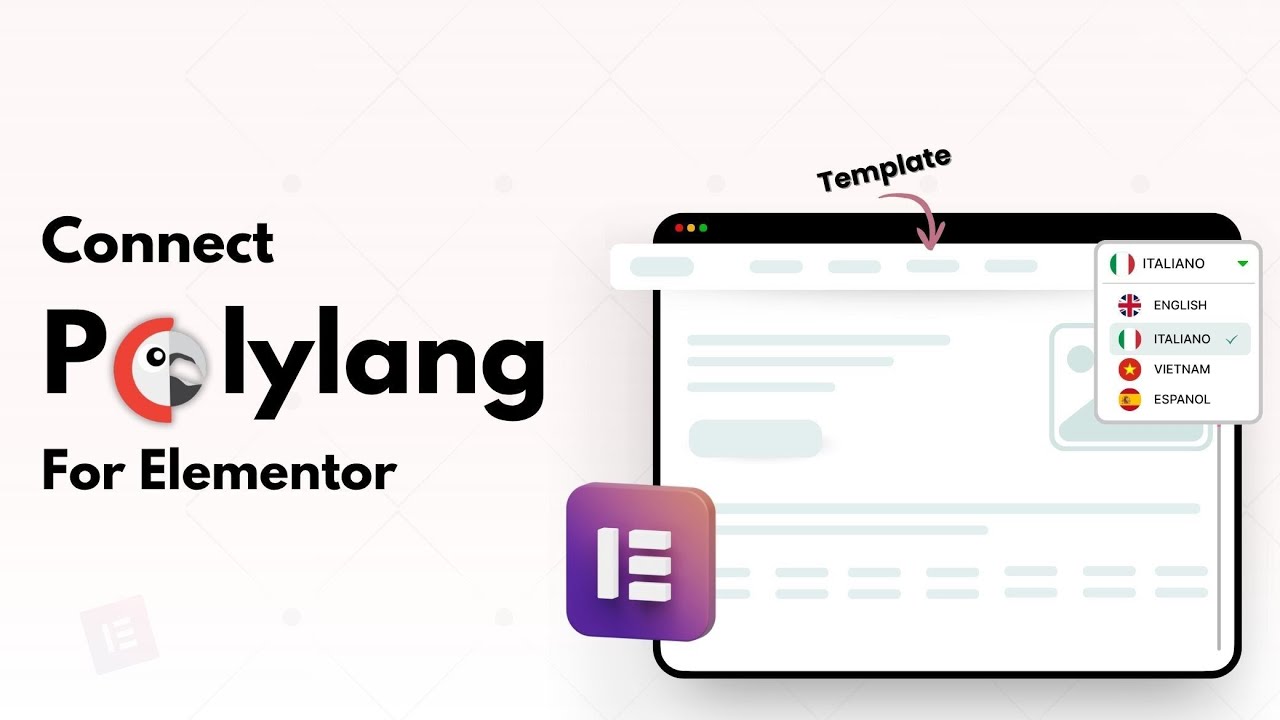
With Connect Polylang for Elementor, you can add a language switcher directly inside Elementor and control the visibility of languages on your website.
Add Language Switcher in Elementor
Follow the steps below to add a dedicated Language Switcher widget:
- Edit your header template with Elementor Editor.
- From the Elementor widgets panel, search for “Language Switcher”.

- Drag and drop the Language Switcher.
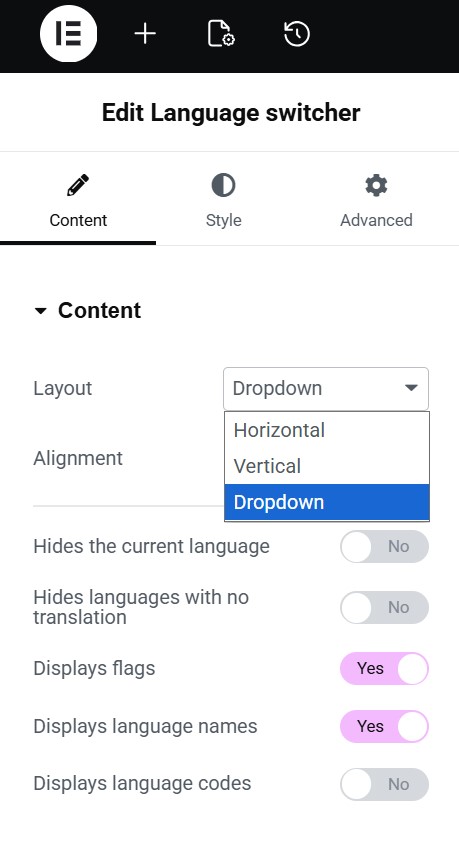
- From the widget settings, customize:
- Layout: vertical, horizontal, or dropdown.
- Alignment: Choose the position of the language switcher (left, center, or right).
- Hide the Current Language: Enable this option to hide the currently active language from the switcher.
- Hide Languages With No Translation: Enable this option to hide languages that do not have translated content.
- Display Flags: Enable this option to show country flags with languages.
- Display Language Names: Enable this option to show full language names.
- Display Language Codes: Enable this option to show short language codes like EN or FR.
- Once added, the switcher will automatically display all languages configured in Polylang.
Add Floating Language Switcher
With Connect Polylang for Elementor, you can also enable a Floating Language Switcher. This is useful when you don’t want to place a language switcher inside the header or layout but still want easy access for visitors.
Follow the steps below to enable and configure the floating language switcher:
- From your WordPress Dashboard, navigate to Connect Polylang > Floating Language Switcher.
- Enable the Floating Language Switcher. Once enabled, the switcher will appear on the front end of your website.
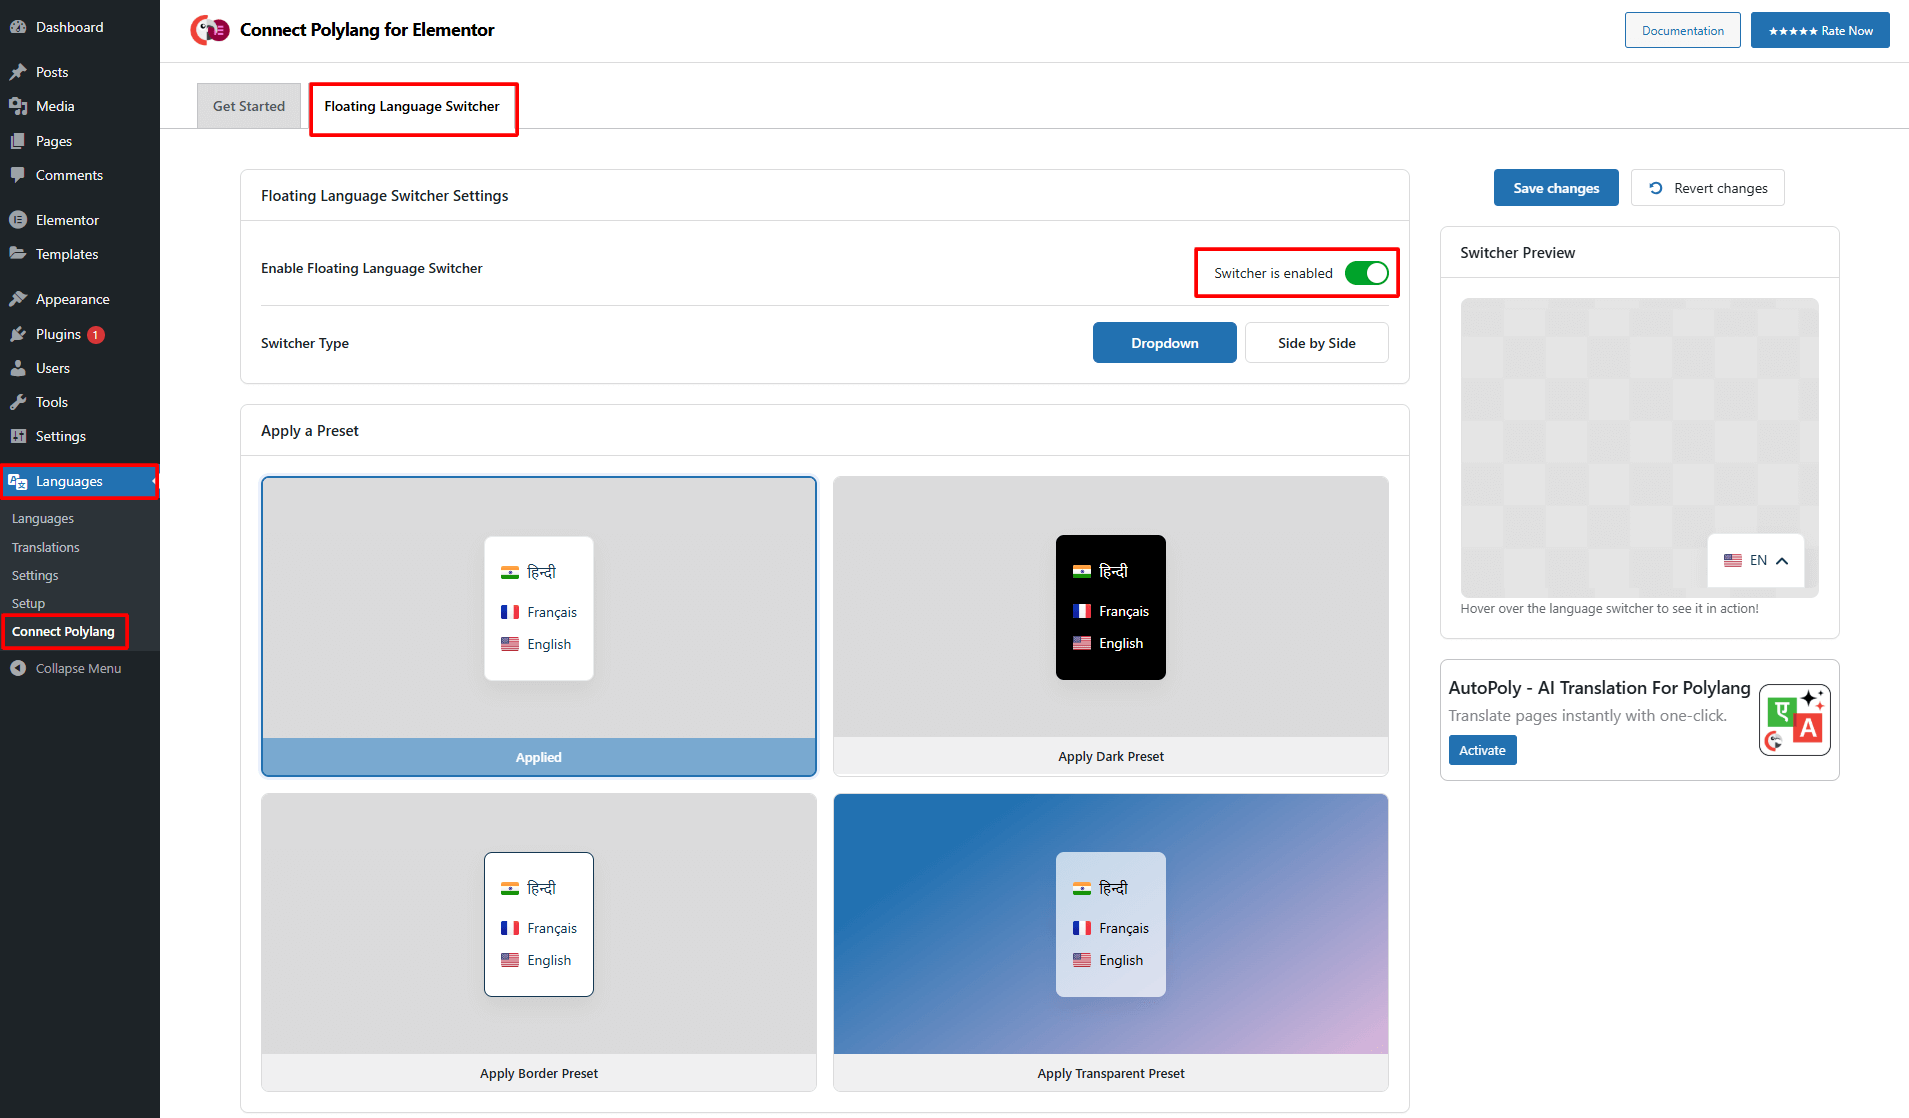
- Switcher Type: Choose the type of floating switcher from dropdown or side by side.
- Apply a Preset Style: Choose any one style for the floating language switcher.
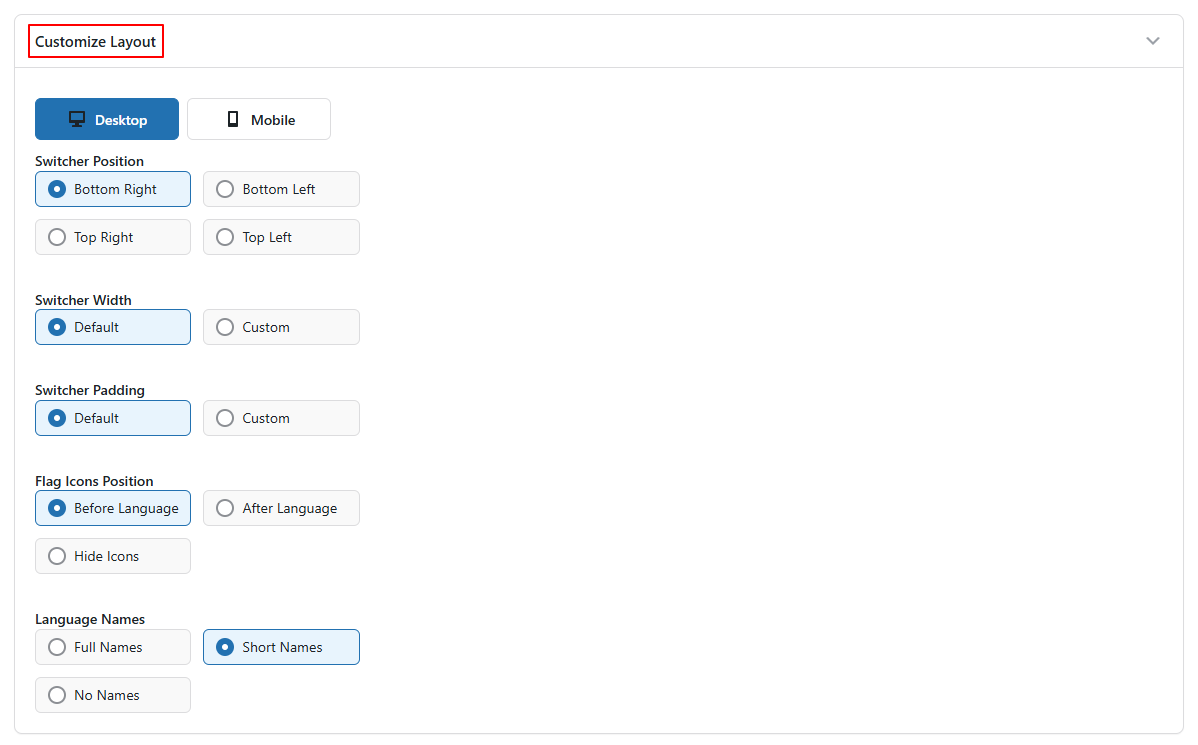
- Customize Layout: Customize the layout of the floating language switcher using following settings:
- Flag Icon Position: Choose whether you want a flag icon before language, after language, or want to hide icons.
- Language Names: Choose whether you want to display full language names, short names, or none.
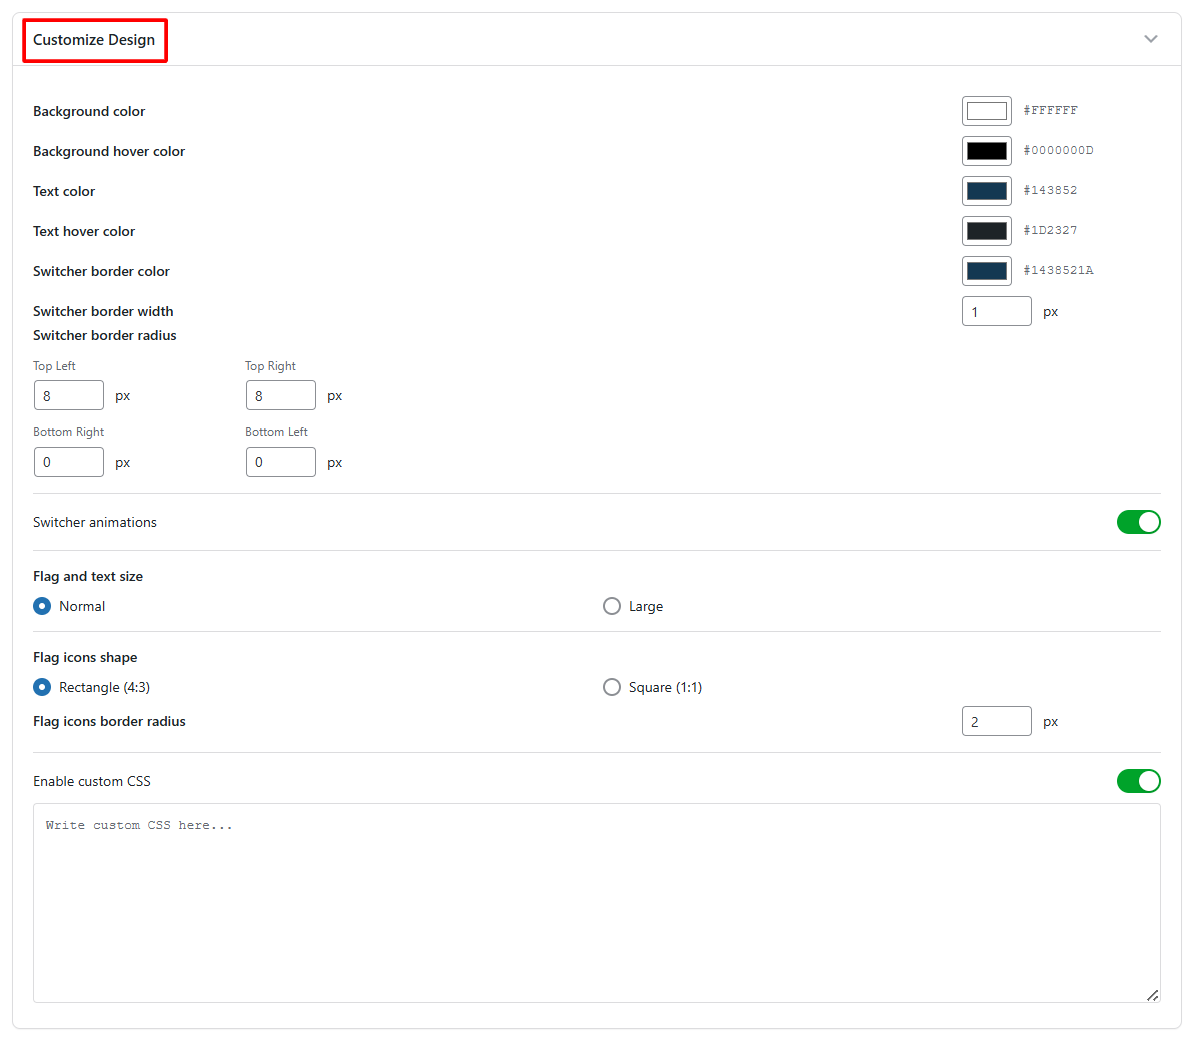
- Customize Design: Customize the appearance of the floating switcher by adjusting background color, text color, text hover color, border color, width, radius, and more.
- After satisfied, click Save Changes, your floating language switcher will be live.
Language Visibility
Language Visibility allows you to control which Elementor widgets appear on a specific language page. Follow the steps below to control the language visibility of widgets:
- From your WordPress dashboard, navigate to pages section.
- Edit a page using Elementor.
- Click on the widget you want to show or hide for a specific language.
- Go to the Advanced tab in the widget settings.
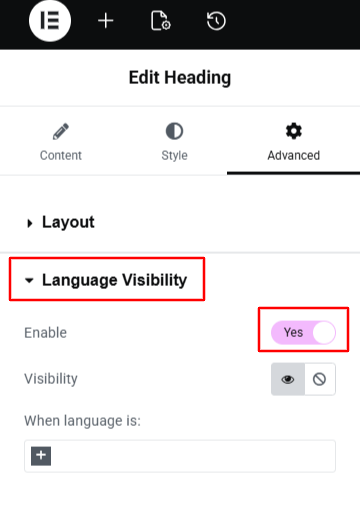
- Scroll down to the Language Visibility section.
- Toggle on the Language Visibility option.
- Visibility: Select whether you want the widget to be displayed or hidden for the selected languages.
- When Language is: Choose one or more languages from the list.
(This works like: show or hide (specific widget) when the language is (chosen language)) - Update or publish the page.
That’s it. The selected widget will now appear only for the chosen language and remain hidden for all other languages.