
Creating a user engaging content is a must for any blogging website but even if you are not running a blogging website, you may still want to show your company’s achievements or history in a cool and appealing way.
Displaying your website’s content in a timeline is one of the most appealing way these days. Before we get into all the technical stuff of creating the timeline, let’s consider some example where creating a timeline is more appealing than the regular blog content.
- A history of a company: Creating a Timeline to showcase the company’s history is much more attractive and readable than the regular essay type of content. Anyone will consider gazing over a vertical timeline that showcases the achievements and milestones of a company in chronological order than reading a lengthy post.
- Official Workflow: Every company has a specific workflow for how they operate and do all their daily stuff. Creating a point-to-point or step-by-step guide is a story of old age. Timeline is a modern way of displaying regular stuff in more stylish ways. Not only the official workflow but even creating a project workflow in a timeline is more appealing than the regular post.
- Team Members: I’m sure you already get an idea. There are already plugins out there for showcasing team members but a timeline representation of the team members not only showcase the members itself but it is useful in showing the hierarchy of the team.
- Event Planning:
the list can goes on and on…
There are dozens of reasons you can find to create a timeline instead of a regular post. I’m sure you’ll find more than one reason, why you should create a timeline. If you have already decided to create a timeline, let me guide you step-by-step to create a timeline with the minimal configuration in no time.
Plugin Name: Timeline Builder Pro.
Difficulty Level: None.
Now, we’ll create a timeline to understand its working. We are going to create a timeline about project workflow. Just follow along me and you are good to go.
I am assuming that you have already downloaded and activated the plugin on your WordPress website. As soon as the Timeline Builder Pro is activated on your WordPress site, you’ll see a menu “Timeline Addon” menu in the WordPress admin menu bar.
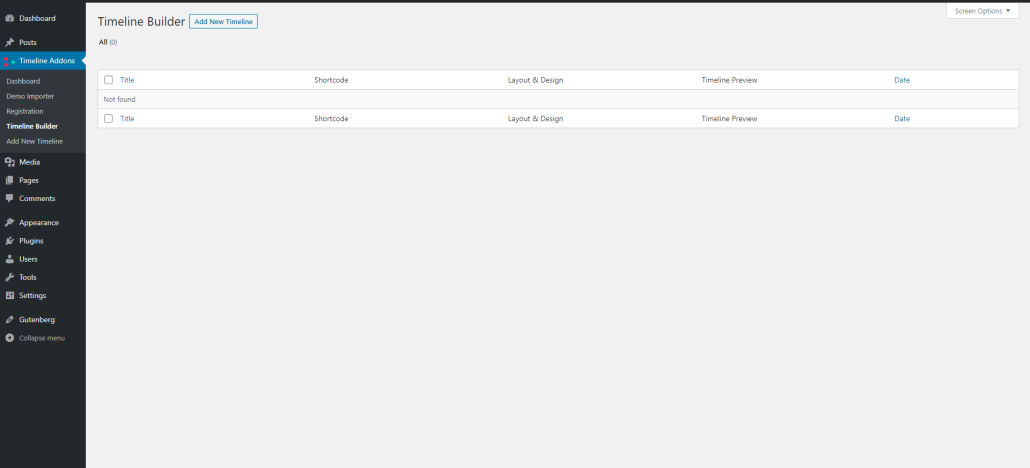
Navigate To the Timeline Addons > Timeline Builder and you’ll land on a page where all your timelines will be listed. This page does not contain any timeline as we just did a fresh installation of the plugin. (Fig 1)
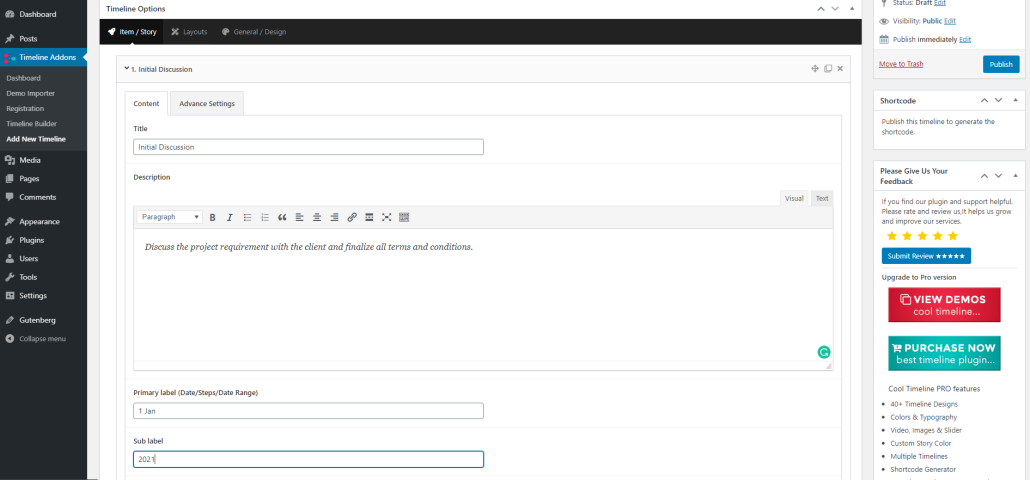
Click on the button “Add New Timeline” button to create a new timeline and it will add a new timeline post and navigate you to the newly created timeline post. As you can see (fig 2) a new timeline is created and we have given it a title: Project Workflow. Obviously, you can give any name to your timeline that you like.
As it’s visible in the screenshot, timeline builder pro plugin has added some default stories for you with some random content. You must change this to something more useful for your website.
Let’s take a quick look to all the required stuff we should change or add.
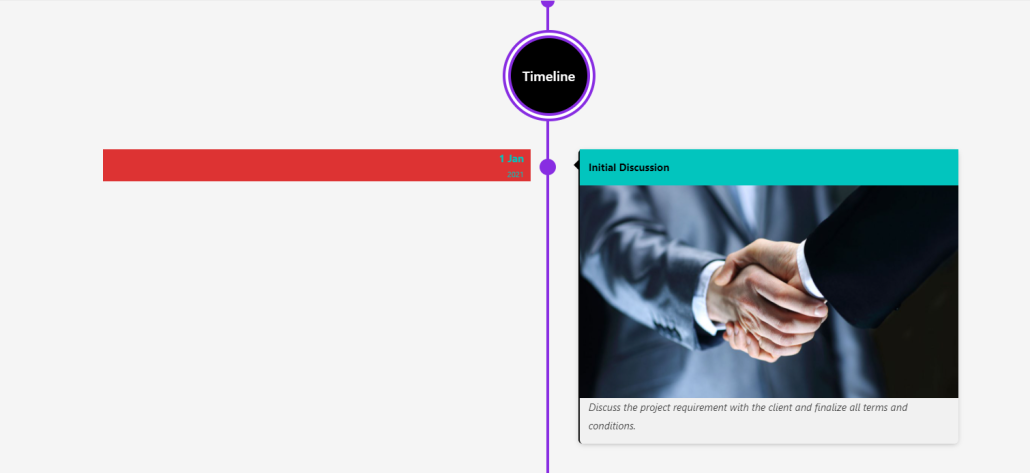
Title: This is the title of your story, each should have a unique title according to the story. Let’s change this to:- Initial Discussion.
The title can be long but just don’t make it too long that it took away the overall grace of the timeline design.
Description: You can add descriptive content here. For example: while creating a project workflow, you can write about the steps in details here. For the sake of this tutorial, just add the following lines in the description:- Discuss the project requirement with the client and finalize all terms and conditions. The discussion field has a rich text box. You can actually format all the text or add HTML content here. This field actually allows you to add as much text as you want but here is my advice for creating a good timeline; keep it short and simple.
Primary Label: You can think of it as a small section in a chapter you would like to highlight. For a project with deadlines, you probably write the date of starting the project here. Let’s change this to:- 1 Jan.
Sub Label: Sublabel is more like a subheading. Just change this to:- 2021 and move ahead.
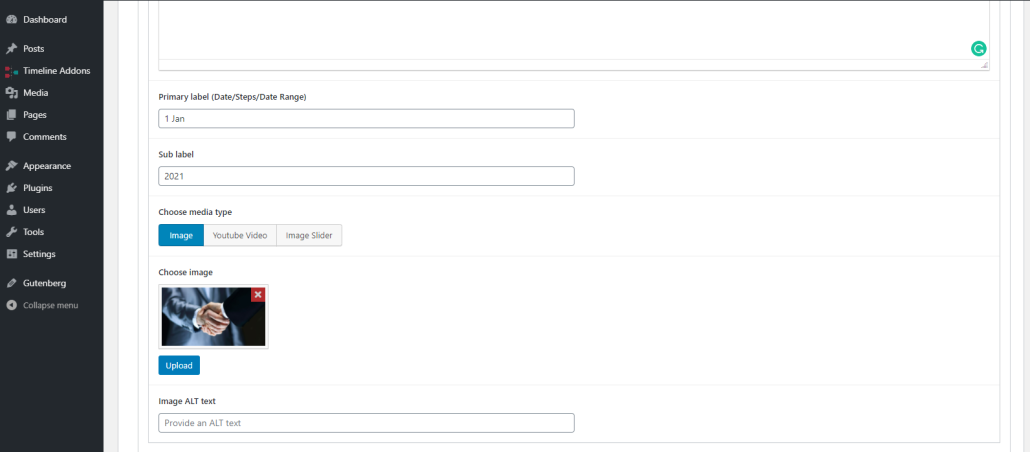
Choose Media Type: Each story contains media. There are three options available to add media. A media can be an image, a youtube video link or an image slider. We are going to add an image of handshake here by selecting media type as image and upload the image by clicking on the button upload. This is straight forward I guess, this is same as uploading a featured image in the WordPress post.
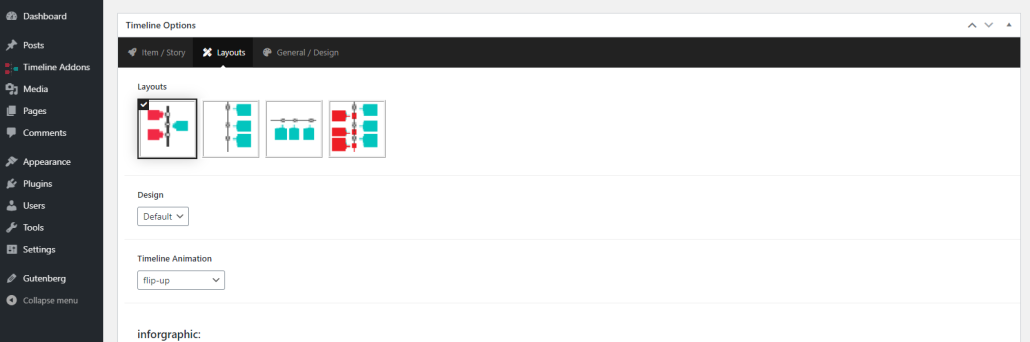
Now click on the Layouts tab at the top bar and this will brings the layout related option. We are not going to keep the layout and design as the default selection which is ‘Both Sided’ layout and ‘default’ design. Just reach to the ‘timeline animation ‘option and we’ll change this to ‘flip-up’. if you don’t see this option, you might have changed the layout to something else. Only a few layouts have this option so you may want to change it back to the both-sided or one-sided layout.
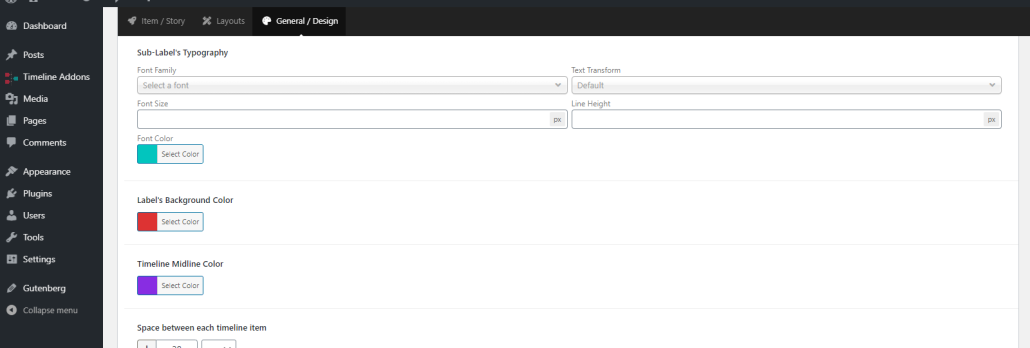
Everything is straight forward right? Now change to another tab by clicking over the ‘General / Design’ tab at the top bar. You’ll see a lot of typography and colour settings. The different combination of these settings can change the overall colour theme of each timeline. We’ll be changing the ‘Label’s Background Color‘ to red and ‘Timeline Midline Color’ to blue in a lighter shade. You may need to scroll a little bit to find this option below. You may want to change the other settings to find the best colour theme for your timeline.
We only have added a single story and you actually have to repeat these steps for other stories too. But for now, just hit the ‘Publish’ button to publish this timeline and add this timeline on any page by using the shortcode provided in the ‘Shortcode’ sidebar widget. You can also use the ‘Preview Changes’ button to preview the timeline on the front end without using it on your website right now. Let’s have a look at our timeline on frontend:-
See, how super easy it is to create a timeline using the Timeline Builder Pro plugin by coolplugins.net. Now before you do a google search for all the available (other) plugins to create a timeline, let’s see why should you consider using the Timeline Builder Pro plugin.
- Easy to setup: The Timeline Builder Pro is super easy to use and creating a timeline requires the time you takes to create the content. A timeline can be created as quickly as you can be ready with the content to publish. In a nutshell, creating a timeline with Timeline Builder Pro is similar to creating a post in WordPress. It’s easy and it’s fun.
- Easy to customize: It only takes a few clicks to customize everything and its all optional. You can decide what you want to change and what you want to keep as default. The customization settings are created in such a way that a beginner with zero experience can configure the timeline like a pro.
- Advanced Design: Most of the timeline plugin only has simple timeline designs. The Timeline Builder Pro plugin is equipped with advanced layout with multiple designs and it only takes few clicks to change the design. The plugin keeps updating with new designs and as soon as you’ll change a design, everything looks fresh again.
- The vast variety of combination: The timeline builder pro offer so many configurations to customize the timeline that you can create almost endless colour designs with different combinations. You can create multiple timelines with a different colour scheme. For example; you can create a timeline for your Christmas events with a Christmas theme.
- Responsive designs: All the designs in the Timeline Builder Pro are responsive and it is the most important factor for any website. An advanced design is of no use if it’s not responsive for the different devices in use these days.
Final Words
There are a lots of themes and page designing plugins to make an appealing website but some content must stands out from the rest of the website. A history of the company, achievements, ongoing project and goals etc, are some of the few examples of the content that should standout and must be visible clearly to the visitors. There is a reasons why not all the stones in our ways aren’t consider as a milestones. A timeline is one of the best way to create a unique and appealing design for such milestones of your company. So next time when you want some content to be stands out from the rest, try the Timeline Builder Pro to create such a unique content. The best part of using this plugin is, its developed and supported by the experts and codecanyon’s elite author. The plugin is developed with the best coding standard implemented by the WordPress itself. So, if you are using a plugin like Timeline Builder Pro, you are always in good hands.