

Microsoft Edge Built-in AI requires the necessary language packs to be installed before it can translate content.
Why Are Language Packs Required?
Microsoft Edge uses on-device language models for translation.
That is why to translate content from one language to another, both the source and target language packs must be installed in your browser.
Translation Language Setup
Follow these steps to install the required language packs:
Step 1: Use a Secure Connection
First, make sure that your connection is secure; otherwise, Translation API will not work properly. If you’re using a non-secure (http://) site or localhost:
- Please switch to a secure connection (HTTPS) or add this URL to the list of insecure origins treated as secure by visiting edge://flags/#unsafely-treat-insecure-origin-as-secure. Click on the URL to copy it, then open a new window and paste this URL to access the settings.
Step 2: Edge AI Setup Configuration
You can verify your Microsoft Edge AI setup directly from the plugin dashboard.
- From your WordPress dashboard, navigate to Languages > AutoPoly > Settings.
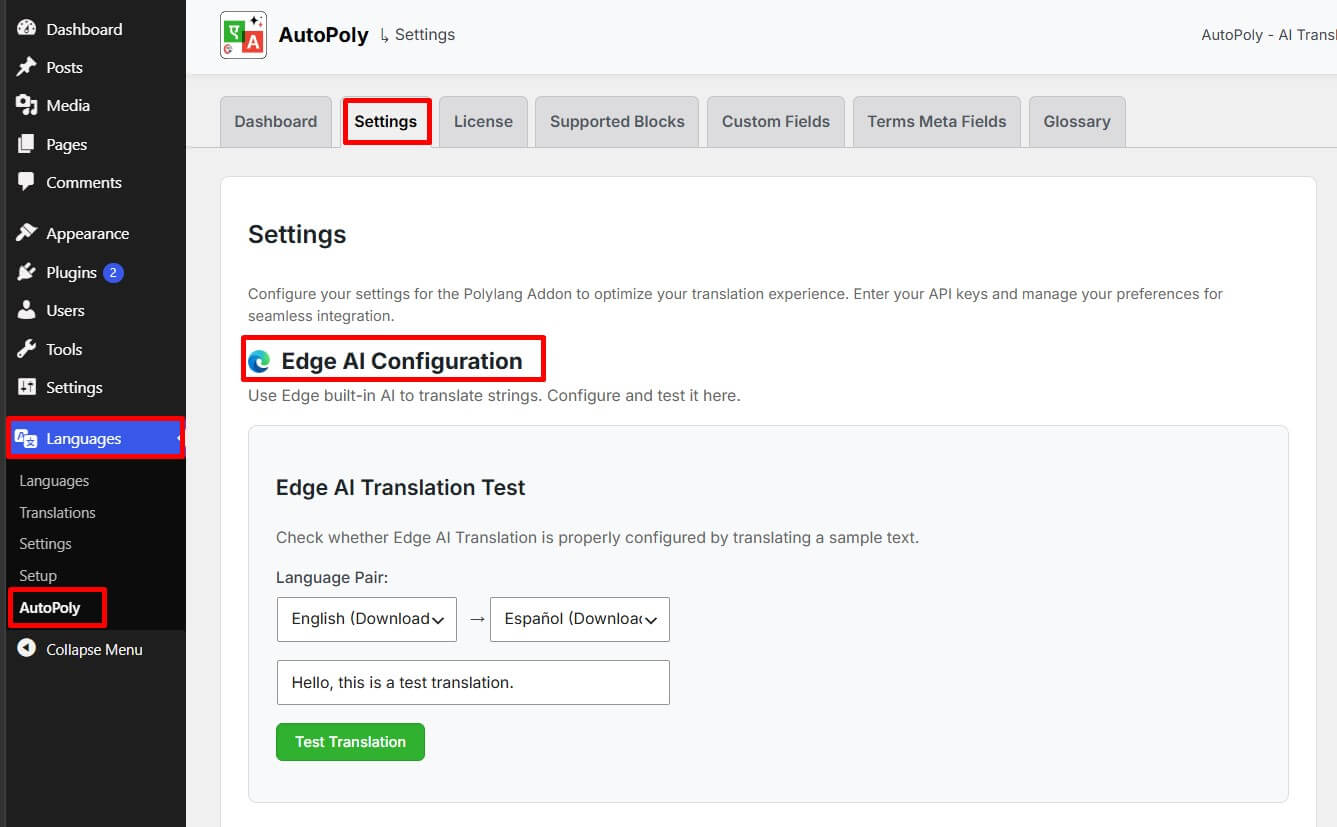
- Under the Edge AI Configuration section, you can:
- Test translations using different language pairs.
- Check which language pairs are supported.
Note: During the Edge AI setup configuration, the required language packs are usually downloaded and installed automatically.
Step 3: Install Language Packs
- You can install languages by visiting the following link: edge://on-device-translation-internals/.
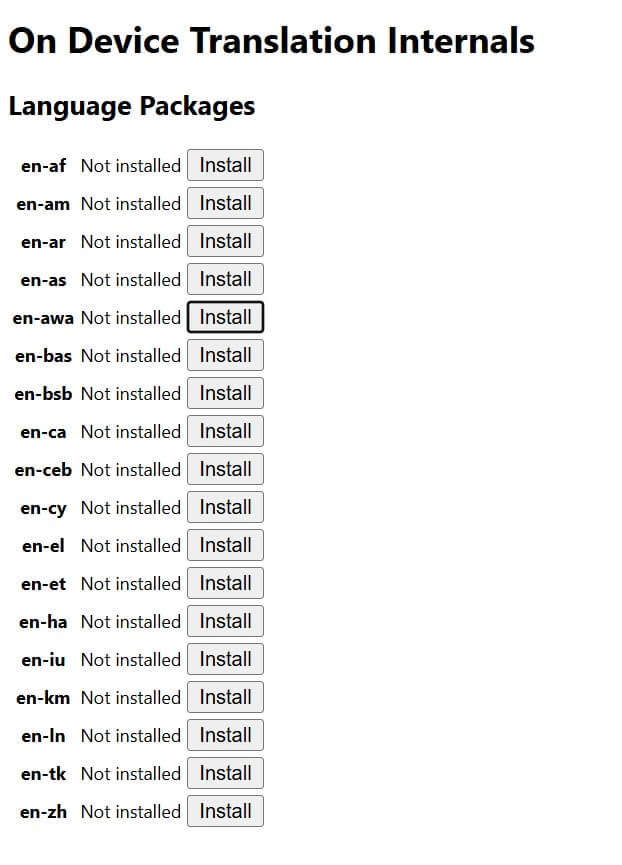
- Please check if both your source
(eg: en)and target(eg: hi)languages are available in the language packs list. - You need to install both language packs for translation to work. You can search for each language by its language code:
enandhi. - After the language pack is installed, reload or restart your browser.
- Now, you have to add this language to your browser’s system languages in Edge settings.
- Go to Settings > Languages > Add languages and add हिन्दी or English to your preferred languages list & reload the page.