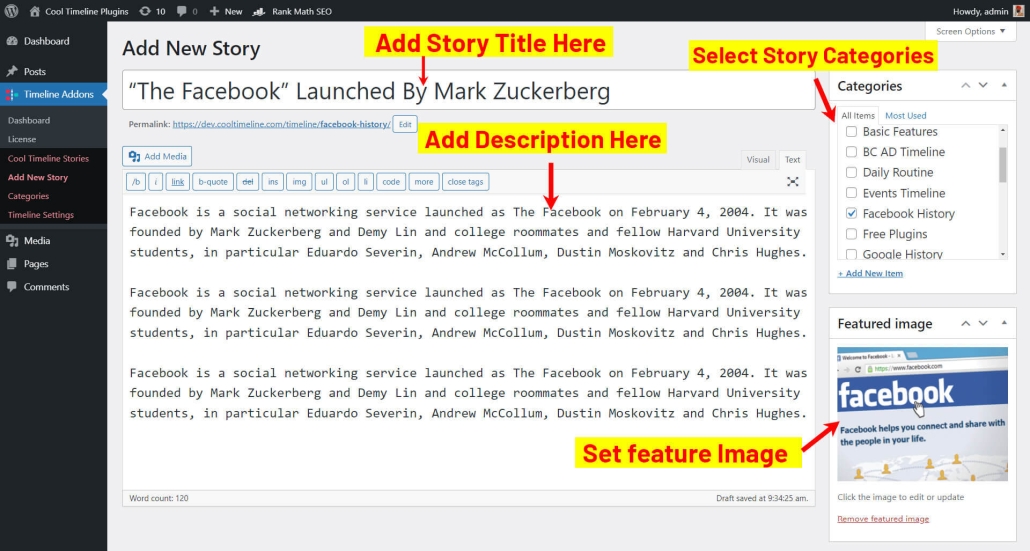
After activating Cool Timeline Pro, you will find a Timeline Stories tab inside your WP Dashboard menu items. Go to Timeline Addons > Add New Story to create a story for your timeline. To create a story, check the screenshot below and follow these points:
- Add Title and Description for your timeline story.
- You can also select a featured image if you want to show the image as a content type instead of a video or slide show.
- You can select a story category to create multiple stories, and you can differentiate your timelines based upon different categories.
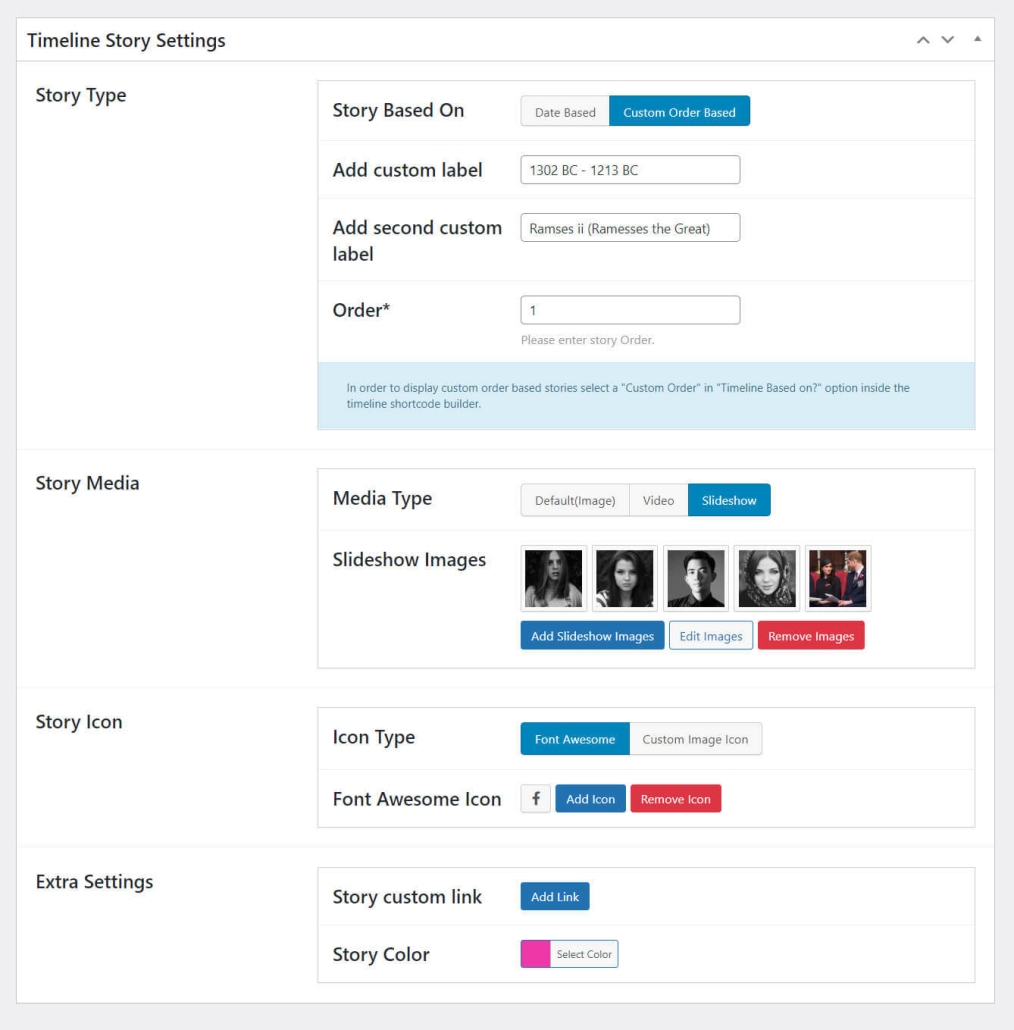
Timeline Story Settings:-
- Select Date Based settings for date-based timelines. Remember to select a story date before publishing your story.
- You can select different icons for every timeline story.
- Select media type – You can show images, videos, and slide shows inside your story.
- Add your link in Story custom link settings, to set external links on stories.
- Set Custom Color on each story with the help of Stories Color Settings.
- If you would like to use your own image icons instead of default Icons, then just select Image Icon and Check the Use Image Icon instead of font-awesome icons settings.