Download the product here. After a successful download, a zip file will be downloaded to your system.
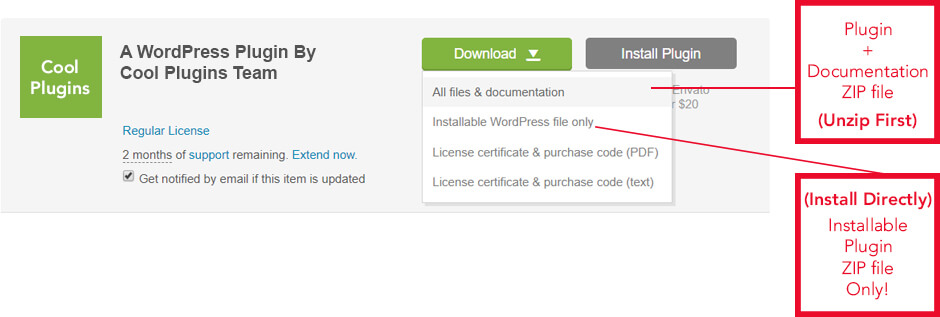
You can download plugin zip files in two ways, either download “All files & documentation” or just download “Installable WordPress file only “.
Unzip this file to grab the main plugin if you download “All files & documentation”, or you can directly install “Installable WordPress file only” by clicking WordPress dashboard >> Plugins >> Add new.
Install via WordPress Admin (best plugin installation method)
Log in to the WordPress Admin panel.
From the left menu panel go to Plugins >> Add New >> Upload to install the plugin.
Click Upload.
From here choose the file you just purchased and downloaded, make sure the file is in (.zip) format.
Click Install Now & activate the plugin after installation.
Install via FTP Account
To install the plugin, use your FTP software and browse to the wp-content/plugins folder.
Extract the main plugin file (.zip) to the folder and upload it to the server. For example, cool-timeline-pro.zip to the cool-timeline-pro folder and then upload to the server.
Once it’s uploaded, go to your WordPress Admin panel and browse to Plugins >> Installed Plugins.